 This Guide to the Tascam HS-P82 and companion RC-F82 is intended to provide the new user a concise review of the operation and setup of this portable multitrack recorder, along with explanations and a suggested workflow for professional film/video applications.
It is not meant to replace the comprehensive Owners Manuals provided with the equipment, but rather to supplement those documents.
Note: Please download the latest version of this guide, Users Guide to the Tascam HS-P82 v1.20 for Film/Video Applications by Ginsburg, which has been updated to reflect the changes & improvements brought about by firmware version v1.20. The new version of this guide also features better explanations of operation and real world workflow for professional filmmaking applications.
Part 1 deals with the basic setup of the recorder. Part 2 covers recording with the unit, stand alone, without a mixing board. Part 3 discusses using the recorder with an external mixer, and Part 4 deals with the use of the Tascam companion fader controller.
Part 1: Basic Setup
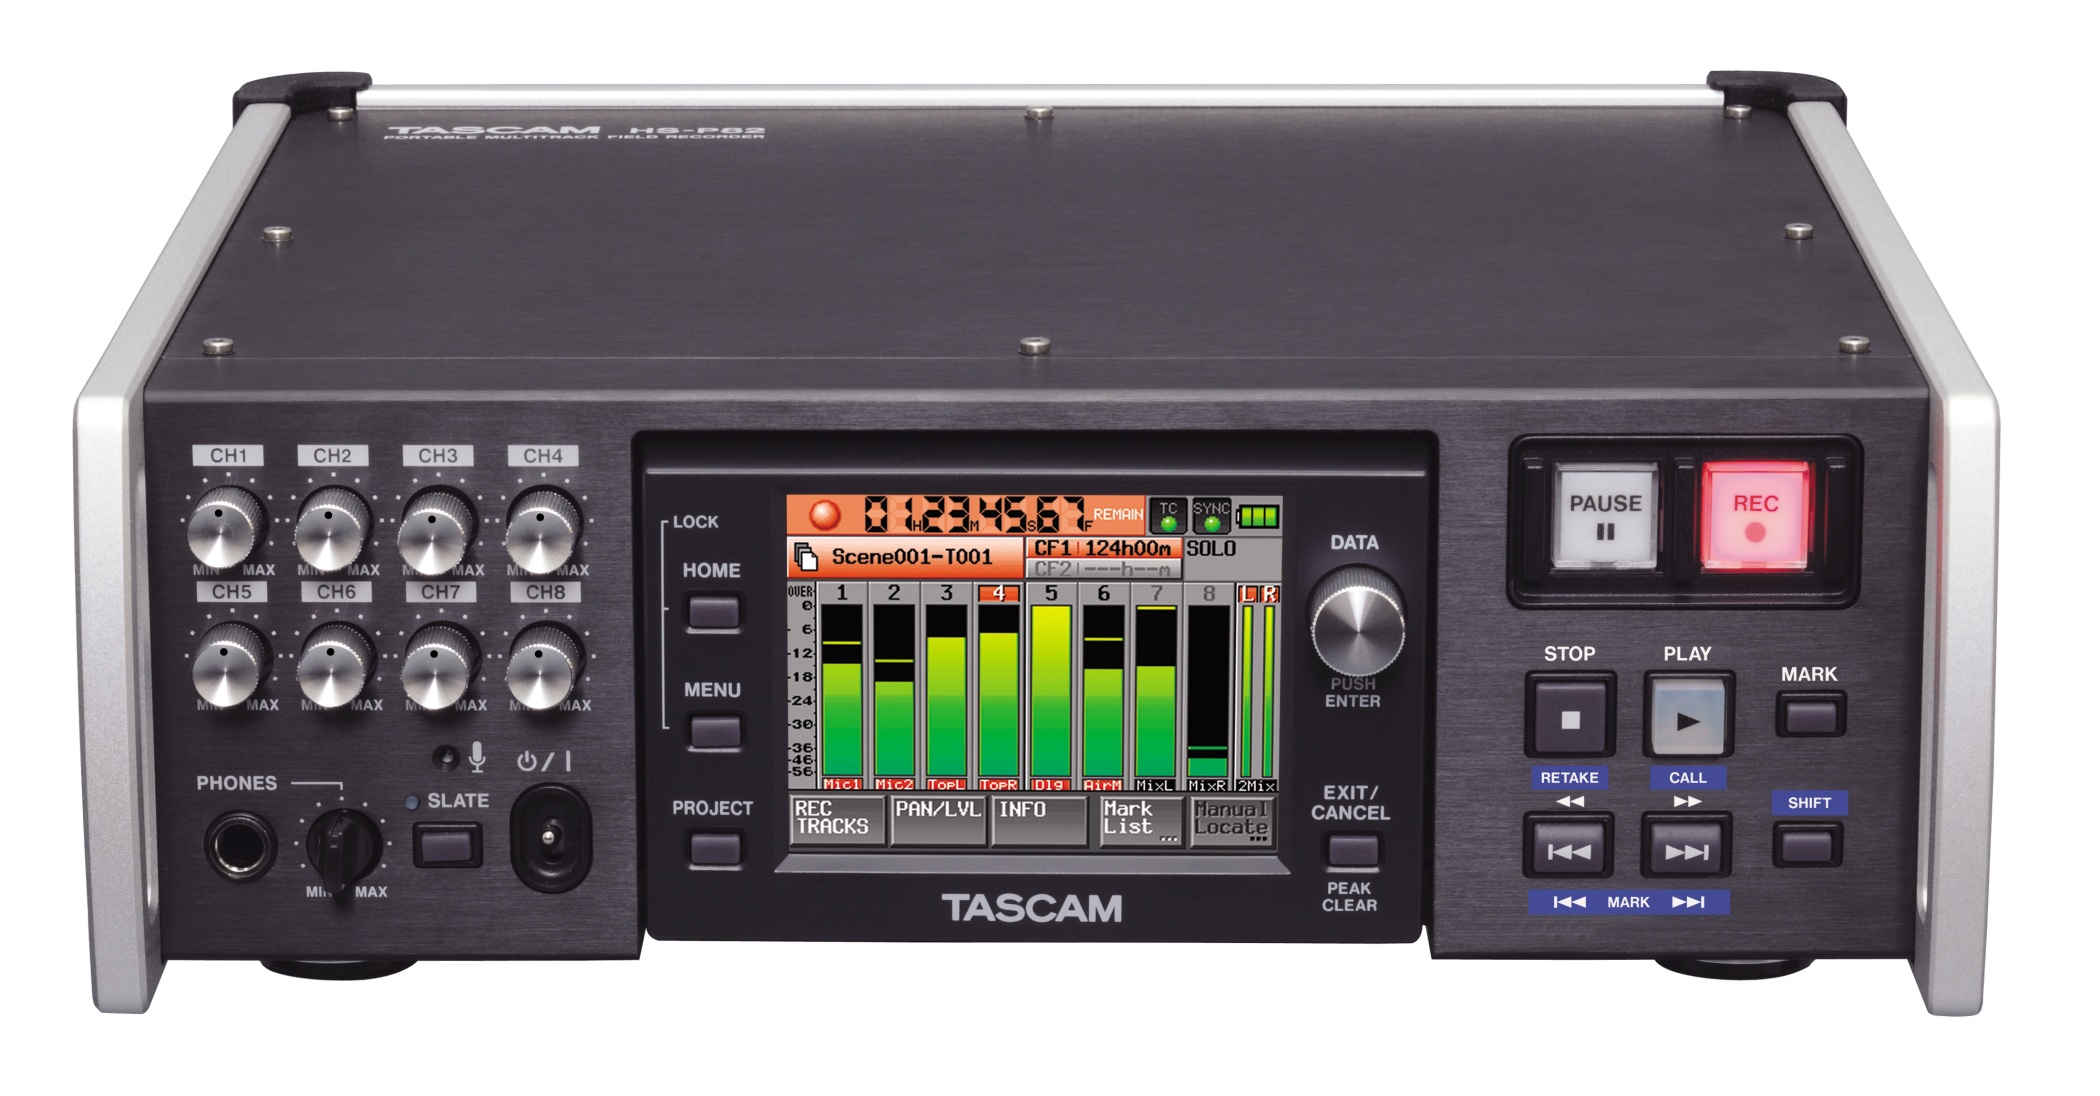
This section is an introduction to the basic operation of the Tascam HS-P82 recorder itself. These steps will guide you through the initial setup of the machine and explain the primary touchscreens and controls that you will need for film/video applications.
One of the nice features of the Tascam is the redundancy of control settings. As you explore the layout of the touchscreen software, you will find that many of the same settings are accessible from multiple screens. In the field, this advantage can really streamline your workflow.
Powering Up
 The Tascam can be powered from internal batteries, AC adapter, or external 12vDC via industry standard XLR 4-pin connector.
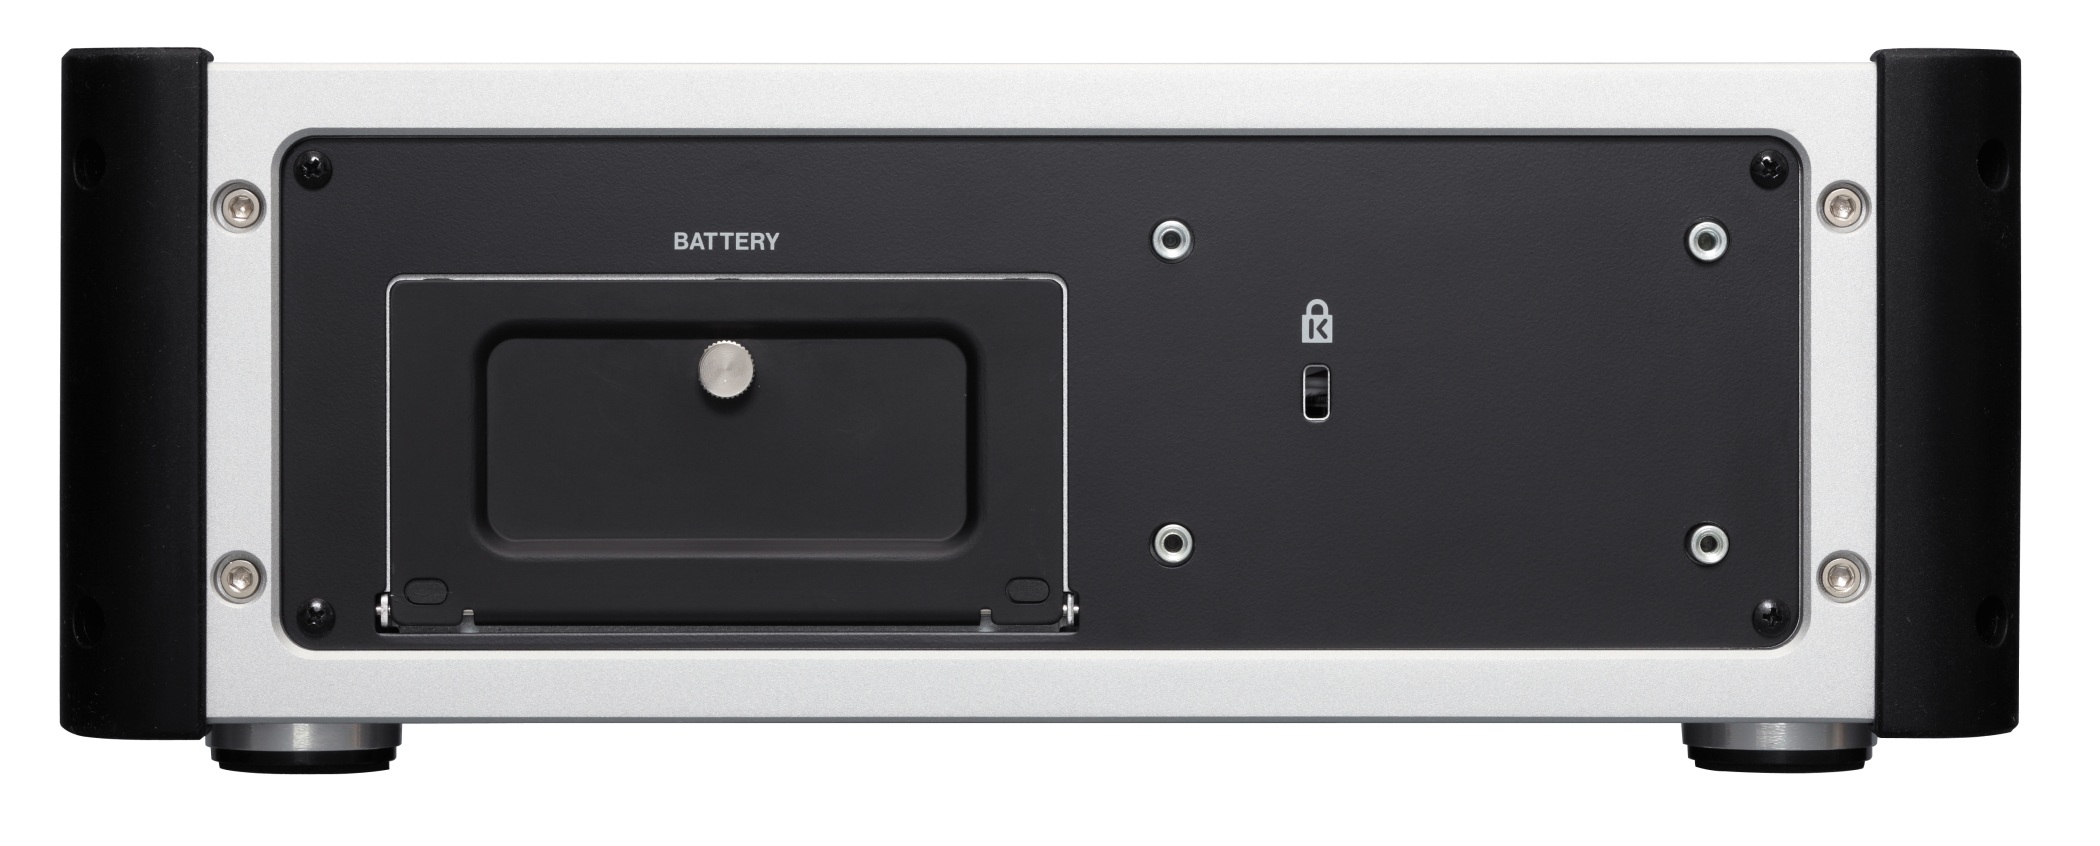
The unit comes with an NP style Battery pack that takes 10 AA alkalines. Even if you are planning to use AC or external power, it is a good idea to load up the battery pack and install it; it will serve as a power backup should your external power be interrupted.
If you have access to them, you could also use standard NP style, rechargeable video batteries.
 Factory supplied AC adapter outputs 12vDC via its donut connector.
Owners (not renters) of this Tascam are encouraged to have a technician replace the OEM donut connector with an XLR 4-pin, as the XLR 4-pin is a more secure connection.
External 12v DC or battery pack equipped with standard XLR 4-pin. Note that the industry standard for the XLR 4-pin is pin 1=positive, and pin 4=negative. Pins 2 and 3 are not used.
Format your CF card
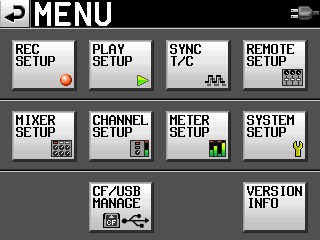 After powering up the unit, press MENU button. Select CF/USB MANAGE screen. Full format the first time you are using a new or used card. It can take a while, so do this BEFORE you arrive on set. Subsequently, just use the quick format button.
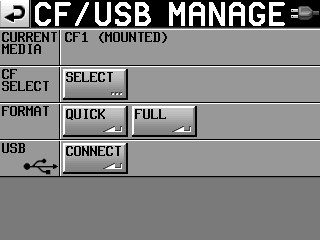 Most mixers utilize the following workflow: Begin the project with a full formatted, fresh compact flash card. At the end of the day, or when the card is almost full, remove the card and transfer the files over to a laptop. As soon as the used card is removed, replace it immediately with a fresh one. Perform a quick format, and then set up your project files, so that your recorder is good to go. (Keep a written notepad with all of your project specs and naming conventions, so that all of your “blank” cards remain consistent.) After transferring the files from the used card, perform a quick format and project setup on that card, as well. In this manner, you will always have one in the machine, and another ready for a quick change out.
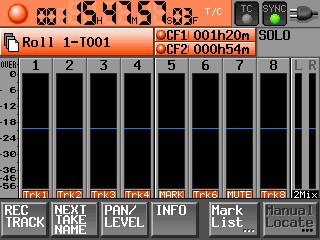
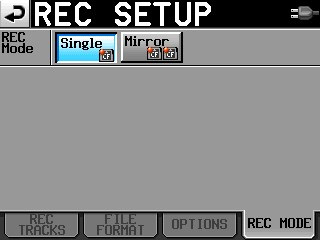 New system firmware version 1.10 offered during the Fall of 2011 enables you to record to two compact flash cards simultaneously, so that your material is still safe in the event that one CF card malfunctions during a recording. A REC MODE tab has been added to the REC SET UP screen, which enables you to activate the Mirror Record function. I recommend that you use two compact flash cards of the same manufacture and read/write specs to insure the best results. Error messages may occur otherwise; as well as if there is not enough memory remaining on one of the cards. The Home screen shows the status of both CF cards.
System Setup
From the MENU button, select the SYSTEM SETUP screen.
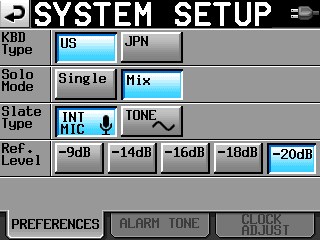 Keyboard type: US.
Solo mode: The default setting for SOLO is SINGLE. That means only one channel at a time can be solo monitored. If you change the solo mode to MIX, then it is possible to highlight and monitor as many channels simultaneously as you want to. MIX is better for film/video applications.
Slate type: you will find yourself alternating between Internal Mic for voice slating your takes, and the TONE setting for recording a headtone at the beginning of your recording session.
Reference Level: These settings do two functions. Not only do they set the record level of the tone generator (which is normally set to -20dB), but it also controls the level for your analog “line level input” such as when you plug in an external mixing panel. So in practice, you would select the -20dB button for recording tone, but later you may need to select a higher setting if you need more gain from the line level inputs. (This will most likely be corrected in a later firmware software release.)
Set the internal clock and date by selecting the tab at the bottom of the screen. Just press any of the displays to adjust the numbers shown.