 What are the objectives or goals of the Production Mixer? When a mixer arrives on a set, there are a set of priorities that we follow in planning out WHAT and HOW to record. This article will lead you through the thought process of establishing your game plan or approach of which soundtrack elements need to be recorded.
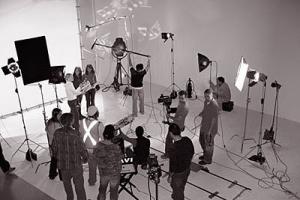
Production Mixers are responsible for capturing the live sounds on a set, but there are priorities to consider. Not all sounds are equally important. Here is an overview of: dialogue, perspective, sync sound effects, wild lines, wild sound effects, background tracks, and proper room tone/ambiance.
Dialogue
The number one priority for Production Sound is to get usable DIALOGUE. The editor needs crisp, clean performances in order to convey the script. Use any technique that you can to insure that all of the dialogue is sharp and usable for the big screen. Don’t worry yet about perspective, sound effects or backgrounds – all of that can be achieved in post-production if necessary. Right now, just concentrate on being able to clearly hear everything that the actors are saying.
Even if you are sure that the dialogue will need to be replaced by ADR or “looping”, always strive to get the best audio that you can. During the ADR session, actors rely on listening intently to the “scratch track” in order to time their delivery for lip synch, but also to re-create the emotional mood and intensity of the original performance.
Another reason to always bring home the best dialogue possible, even if you know that it will probably be looped, is: job security. If you just give up on the task, and record only a minimal quality “scratch track” – the producers may question the need for a high quality sound mixer such as you. It is possible that you will be let go from the production, and replaced by a less experienced, albeit less expensive, soundperson. Why pay someone the big bucks for only a low grade scratch track?
On the other hand, if you continually demonstrate that a usable, original dialogue track would be possible, say if it hadn’t been for the noisy generator – then the person risking replacement might more likely be the gaffer or the generator operator!
Perspective
Only after you are confident that all of the dialogue will be captured crisp and clean, begin to consider recording with proper perspective. By perspective, we mean that the audio heard by the audience should roughly match the camera point-of-view. Of course it may not match the POV absolutely realistically; some allowance for poetic license must be granted, or we would never hear actors in a long shot!
A common mistake for novice mixers is to record close-ups louder than medium and long shots. This happens a lot because when close-ups are boomed from above, the microphone is ideally placed relatively close to the actor. During the wider takes, the boom needs to be further away – thus resulting in lower volume.
But when these various camera angles are intercut, the abrupt changes in volume are annoying and unnatural. Use your mixing panel to lower the volume on close-ups so as to match your medium wide shots. The only time the volume should vary from close-up to wider shot is when the actor notably walks further away from the established POV. Volume can change for perceived DISTANCE, but should not change for ANGLE OF VIEW.
What really changes when we go from a tight shot to a wider angle is the viewer’s perception of ambiance. In real life, volume changes but little when someone converses with you from only a couple feet away, and then backs off to several feet. What does change, though, is how your brain filters the data stream.
When we are “zoomed in” on a close face, our brain tends to filter out background information. We “see” in a close-up. Think tunnel vision. At the same time, we stop paying attention to background sound and just listen intently to the person staring us in the face. It is a mental illusion that we no longer hear the more distant sounds of our environment.
But when a person steps further back, we “zoom out” and observe more of them and their surroundings. At the same time, our brain wants to hear more of the surrounding environment, and we become aware of more noises.
Therefore, in cinema, we can re-create this mental process by controlling how much background we allow into our soundtrack. Close-ups should be primarily dialogue only. Wider angles should consist of a subtle blend of dialogue (no change in volume) and a little more background ambiance.
When the actors are miked with an overhead boom, this blend occurs naturally and automatically. When the mic is closer overhead, we record cleaner dialogue and less background. Move the mic further away, and more background sound joins the dialogue.
However, if the actors are wearing lavaliers, all of the close-ups and wider angles will sound exactly the same, since the mic remains in the same relative place. We can correct for this by using our boom mic to pick up general ambiance and possibly some sound effects (such as footsteps). Gently mix just a touch of audio from this “bleed mic” into the soundtrack to simulate a wider perspective, and minimize the background during close-ups.
Beware of common perspective mis-matches. Most of these are caused by improper boom placement.
For example, a front to back mismatch will occur should the actor move forward, approaching the camera, but is being boomed from deep in the set (away from camera). When the actor is deep in the set, the boom had no problem keeping the actor under the mic. But as the actor moves forward, the boom cannot keep up with him, and begins to mic the actor from the (actor’s) back. Then, as the actor moves even closer to the lens, the distance from the mic keeps increasing. So instead of the actor sounding like they are close to the audience, the resulting audio sounds like the actor has turned his back and walked further away! Solution: the boom operator should walk parallel to the actor to maintain relative position; or let the actor begin further away from the mic and walk towards the boom (which is near camera rather than being downstage).
A similar problem will result if the actor walks side to side across the set (or perpendicular to the lens), and the boom operator is locked into a position that prevents the mic from keeping up with the movement. From the camera POV, the actor’s relative frame remains constant (assuming the camera dollies or pans with the actor), yet the resulting audio will drift in and out. Once again, the solution is to encourage the boom operator to parallel the movement of the actor, or to swing the boom from near the camera in order to maintain position above the actor.
Finally, be cautious when mixing between the boom mic and other mics that may be deployed around the set (including lavs worn by actors). Pay attention to the relative perspective. For example, a “plant” mic hidden deep in the set, further away from camera, should sound weaker than the boom mic, which may be closer to the lens. Use the deep mic in order to pick up some dialogue that the boom may not be able to reach, but use just enough volume to achieve clarity without the plant mic sounding overwhelming. The name of the game is subtle.