VU Meter
 The "VU" meter on the ENG44 mixer is technically a peak reading meter and indicates the output level of the audio. Think of zero as the loudest part of dialogue, comparable to a hard laugh or continuous shout. Normal conversation should average down around the minus five range. Dialogue is not like continuous tone that stays constant; dialogue will bounce around considerably. Divide the LED range into four zones: very low, medium, zero, and distorted. Whispers may just barely get the LED's to move. Normal dialogue is in the minus 7 thru minus 3 range (most of the time, but not continuously). Loud dialogue will peg at zero, sometimes going even hotter for a brief instant, and then returning to zero or under. Try not to allow the audio to linger past zero continuously.
Note that these peak meter readings are for the MIXER. At the camera or recorder end, you will adjust the input level to whatever is appropriate for that particular and specific device. For instance, on my Panasonic camcorder I set zero from the mixer to minus ten on the camera. But on my Fostex digital audio recorder, I set zero from the mixer to minus eighteen.
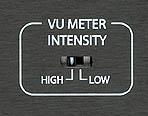 On the underside of the mixer is a switch that allows you to set the brightness level of the LED for your surroundings. Use the weak setting indoors or at night; and use the bright setting for visibility in sunlight. Note that the use of bright metering will increase your battery drain.
Don't forget to "calibrate" your headphone listening level to the VU meter. To do this, turn on the TONE at zero level, and then gradually increase the volume of your headset until the tone sounds just annoyingly loud. Not rock concert loud. More like getting chewed out over the telephone kind of loud. Remember that zero level represents the loud part of dialogue.
So normal dialogue should sound pleasing and comfortable in your phones. Whispers will cause you to automatically raise the input volume; and loud raging will trigger you to turn the mic down! With just a little practice and experience, you will hardly need to watch the LED display at all -- thus freeing you to watch the ACTORS and the BOOM MIC instead.
Output connectors
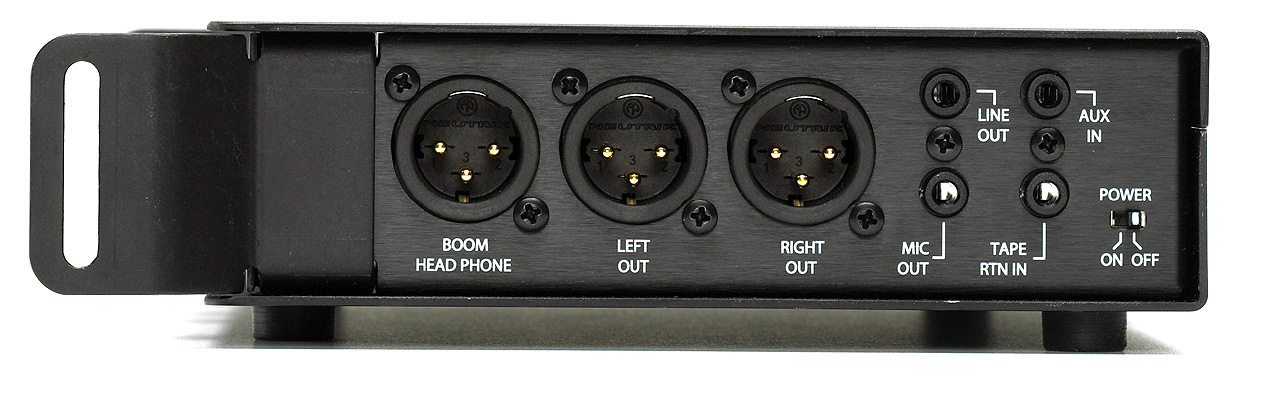 The main outputs of the ENG 44 mixer are XLR type connections, at LINE/MIC LEVEL output. The majority of professional cameras and recorders will accept LINE LEVEL inputs. We prefer to send LINE LEVEL rather than MIC LEVEL signals, because the LINE levels are much stronger (louder) and less prone to electronic or radio wave interference. If your recording device only has RCA line level inputs, then you should purchase "RCA plug to XLR female" adapter cables to use at the recorder end.
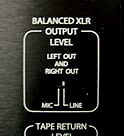 If you connect the XLR line level outputs to XLR MIC LEVEL inputs by mistake, the audio will be extremely loud and distorted! If you need to connect to a MIC LEVEL input, then use the MIC/LINE switch on the bottom of the mixer to select MIC LEVEL output for the main XLR's.
In addition to the XLR outputs, there are four stereo mini (also called "3.5mm stereo") jacks. These jacks are: MIC OUT, LINE OUT, AUX IN, and TAPE RETURN IN. The MIC OUT and LINE OUT offer another way to take your audio signal out of the mixer.
Some consumer camcorders and pocket audio recorders only have stereo mini MIC inputs. Just use a stereo mini to stereo mini adapter cable and you are set.
The LINE OUT jack can be used to feed a pocket recorder that accepts LINE level input. If your pocket recorder offers a choice of LINE or MIC, then use LINE LEVEL since it is less vulnerable to interference.
AUX IN is a LINE INPUT for daisy chaining two mixers together so that you have eight inputs. Connect the LINE OUT jack to the AUX IN. You do not have level control over the AUX IN, so you must adjust the output level of the other mixer to balance nicely with the audio levels of the your mixer.
TAPE RETURN is for taking a headphone feed from the recorder and bringing it back to the mixer. A switch near the headphone volume control allows you to monitor either your mixer or the recorder. You can adjust the relative listening level of the return headphone feed with the controls on the underside of the mixer. Set the return level so that it matches closely to the "mixer" level, as you select back and forth.