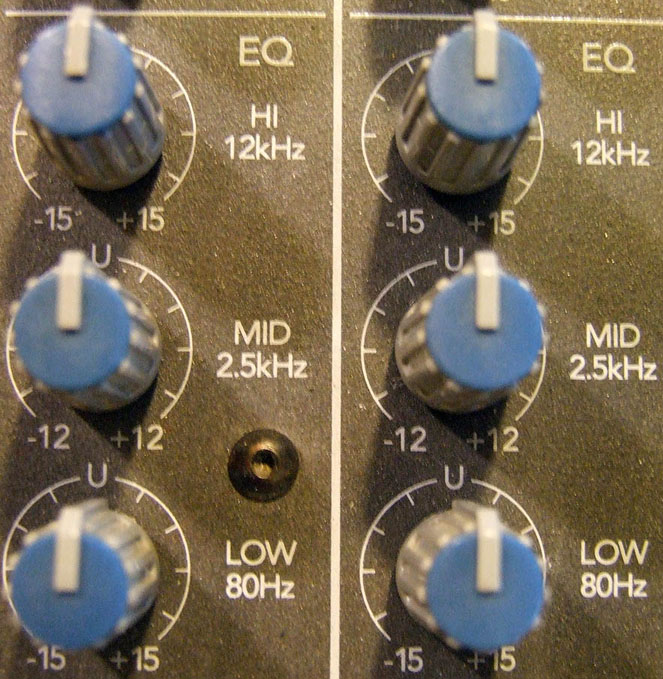
Equalization
For each input, there are 3 channels of equalization that allow you to increase/decrease low, middle, and high frequencies. Use your EQ sparingly and carefully, because you cannot undo those changes in post-production.
Low frequencies often affect noise such as wind, traffic rumble, and vibration. But it may also take the bottom end out of speech, so be careful. I like to roll off a fair amount of bass on my exterior shots, and take out just a little from interiors. If your microphone has a low-cut dip switch, that is sufficient for interiors. The low cut button on the mixer is a more consistent way of reducing bass for exteriors than using the variable EQ knob.
Middle frequencies cover most of human speech, so a slight increase of mid-range can help to improve clarity. If you choose to use a slight mid-range bump, be careful to use it consistently (in other words, all the time). Otherwise, play it safe and leave the mid-range alone.
High frequency adjustment is rarely needed. Leave it alone.
The time to employ your EQ settings is when you need to match secondary microphones to your primary mic. Do NOT use your EQ settings to just make the boom mic or main microphone sound better on a take by take basis. Instead, use your EQ controls to make other mics in the set (lavaliers, plant mics, hidden mics, a second boom mic) match the sound of your primary mic.
Let's assume that most of your show is being covered by a shotgun mic on a boompole. That makes the sound from your boom the basic tone of the dialog. That tone should be clear and natural. Almost no EQ, except for some bass roll-off during exteriors.
 In some scenes, you need to deploy additional microphones, such as a second boom, lavalier, or planted mic. Obviously, the tone of these other mics may be different from your main boom mic.
That is when you would use the EQ knobs! Try to make the other mics match the main microphone. But be careful not to overdo it.
Do that by having an actor (or crew member) speak into a secondary mic, at the same time being boomed by the main mic. Compare the audio, and make subtle adjustments to the EQ of the secondary mic so that it sounds more like the main mic. But NEVER adjust the main mic to sound like a secondary mic!
If in doubt, leave the EQ knobs alone and let the re-recording mixers fix it in the final mix. Any changes that you make in the field cannot be undone later, so only attempt what you are confident in doing.
Sometimes, and I emphasize that this happens very rarely, a qualified sound mixer will use the EQ settings to filter out an offending noise on the set. It is difficult to filter most noises out, since they usually overlap the same frequencies as dialog. Very few environmental noises are limited to a narrow frequency.
About the only time I have used extensive EQ settings to "repair" a bad set is when I knew that the audio did not have to match other audio in the film. For instance, let's say a scene takes place in the meat locker of warehouse. In order to get as clean a track as possible, over all of the resident freezer noise, I fudged around with the EQ. Aesthetically, the actors can sound different in a meat locker than they would in a normal, interior set – so I am not violating consistency. However, I do keep very detailed notes of what settings and mics I used for the meat locker scene, in case we have to re-shoot anything in there later on.
When you use the EQ to reduce a noise, you also take a slice out of the dialog, so be very careful. Only try to remove noise if the take has to stand on its own (bare bones editing; not going to a mixdown) or if the noise is so bad that the scene will probably end up being looped (so you have nothing to lose by screwing up).
To use the EQ for reducing noise, first try to isolate the frequencies by amplifying the noise. Turn the EQ knobs louder to make the noise as prominent as possible. Now you know what settings affect it. Now, turn the EQ to negative settings to minimize those offending frequencies.