Rigging Lavaliers
Outside the Clothing
In many situations, it is permissible for the microphone to be visible in the shot. Needless to say, this simplifies the process of rigging the little devils quite a bit!
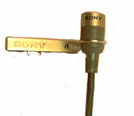
To begin with, you should be familiar with the proper technique of using a tie bar type mounting clip.
Secure the mic capsule (head) in the clip as one would expect. Then, loop the mic cable around in a "J" so that it circles upward and re-enters the tie clip. The cable should pass freely through the closed end side of the clip where it hinges (the side farthest away from the jaws). With the tie bar in place on the clothing, continue the mic cable up and around so that it completes a circle behind the clothing.
Bring the cable back down (still behind the clothing) and secure it inside of the spring jaws of the clip. The action of the metal clip will serve to eliminate conductive cable noise from being transmitted to the mic capsule. It will also strain relief the mic from any tugging or pulling on the cable.
The remainder of the lavalier’s mic cable should be hidden behind talent’s clothing. Although it is acceptable for the microphone itself to be visible to the audience, there is never an excuse to see a sloppy cable!
The thin cable of the lavalier terminates at some sort of XLR connector/power supply. This supply should be hidden either in a pants pocket, waistband, or at the ankle. Never encourage talent to drag this XLR connector around; you risk great damage to the frail cable and electronic connections. Instead, always secure the connector end to talent, and simply plug a standard XLR mic cable into it. At the end of a take, simply unplug the heavy mic cable from talent and they are free to roam the set without risk to your lavalier mic.
I have found that a heavy duty rubber band with a safety pin works well to secure the power supply inside of a waistband if there are no convenient pockets to use. A heavy sock (or at least the ankle portion of one) works well at the ankle; as also does an ACE bandage or a salvaged ankle holster. Even a strip of gaffers tape works well, but remember to line the ankle with cloth or toilet tissue first. Velcro straps are fine on males, but will destroy fine hosiery and stockings.
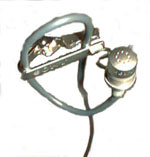
Clip-on lavaliers are often attached to the center chest opening of a shirt/blouse or to the necktie. They can also be attached to the lapel of a sports jacket.
If attaching to a lapel, make sure that you attach to the side most likely for talent to turn towards. (Towards the interviewer, towards the projection screen, etc.)
Although the lavalier is visible to the camera, it does not have to be conspicuous. Remember that in a wide shot, the lavalier is very tiny on screen. In a close-up, the lavalier will be framed out of the shot.
Just a little judicious camouflage will make the lavalier all but invisible. Cover the visible portions of the mic and clip with small strips of white camera tape. Color the tape with magic markers to match the color and pattern of wardrobe.
The Newsman's Loop
Proper use of the tie clip
1. Insert the mic head into clip.
2. Bring cable up and thru the hinge, and then continue down thru the jaws of the clip.
The jaws serve to mute cable vibration.
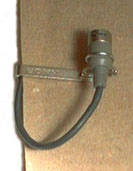
3. Frontal view. The mic cable curves around and up thru the hinge.
Then it continues behind clothing downward thru the jaws of the tie bar.
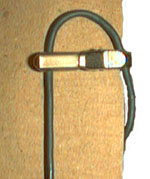
4. Seen from behind the clothing. The loop continues up from the mic and then loops down thru the jaws.
Now we're going to hide lavs under clothing.