 One of the major issues facing both students as well as faculty is dealing with timecode settings for both electronic cinema and sprocketed film, especially when they are combined in the same Avid project.
Here are excerpts from an email thread that recently took place between myself (location sound instructor), one of our editing instructors, and our certified Avid tech. It all begins with an Addendum that I wrote to Senior Film Project Guidelines documents that our college distributes to the students engaged on their Senior Film (thesis) productions.
Addendum to Senior Film Guidelines / Production Sound
By Fred Ginsburg (Oct 2013)
Now that we are finishing as Digital Cinema Packages (DCP), it is important to adhere to using 24bit/48k as your location recording format.
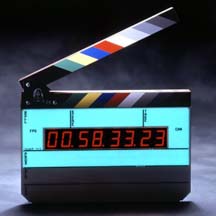
Timecode should be set to 23.97 for electronic cinema (when camera is 23.97) or 24.00 for sprocketed film (or those rare instances when electronic cinema is set to true 24.00 fps). Always verify what the camera rate actually is.
Make sure that you update the User Bits in the timecode at least once per 24 hour period, since timecode will eventually repeat itself. We recommend incorporating the camera media card number (or hard drive number) along with the date. Example, audio user bits could be “CA 09 1007” which stands for Camera drive 09, shot on month 10 and date 07. But whatever data you choose to use, just make sure you change it before the timecode repeats itself.
Track deployments. Be consistent in how you assign and utilize your multiple recording channels on the set. At least one channel should be dedicated as the “live mix” – which will serve for dailies and picture edit. We recommend actually recording in “attenuated dual mono”, which means that in addition to the primary “live mix”, you consider recording a duplicate monaural “live mix” but reduce its gain (at the recorder end, not at the mixer) by 10 or 15 dB.
In the event that your primary monaural “live mix” clips during a line of dialogue or outburst, the editor merely needs to cut to the attenuated version for the duration of the distortion, and then return to the primary soundtrack for the remainder of the scene (or until the next clipped section).
The “live mix” should be recorded on Track 1 (and the attenuated version on Track 2); or on Tracks 9 and 10 – depending on the recorder that you are using. Indicate on your sound reports and in your verbal Header ID’s which tracks are your “live mix”.
Use the remaining tracks for your ISO’s. As much as possible, try to assign the same mics and actors to the same track numbers. Example: Boom 1 could be track 1, Boom 2 could be track 2, Plant 1 could be track 3, Joe could be track 4, Mary could be track 5. If Joe is not in the scene, then leave his track blank or muted. Do not use it for something else, unless you run out of tracks and absolutely need to.
Make sure that your sound reports accurately reflect the content of each track, especially if you have to “borrow” a particular track for a special scene!
On the first day of shooting, utilize head AND tail slates on at least several of your takes. This makes it easier to verify sync, or to trouble shoot if the import settings for picture and audio do not match up.
Notice to Picture Editors: Although the tracks you receive may arrive as stereo pairs instead of as single mono tracks, always treat all of the location tracks as MONAURAL and remember to pan them to the center during editing. Tracks should NOT play out as left speaker, right speaker during dailies and picture edit. Eventually, all of the sound will be panned across a 5.1 array, but that happens during the final mixdown.
The only exception would be wild background sounds (environments) that might intentionally be field recorded in STEREO. But those would be separate from dialogue takes, and clearly indicated on the sound reports. They would NOT be embedded with “live mixes” and ISO’s. You probably will not be dealing with them until the sound editing phase of post.
Remember, for your Dailies and Picture Edit – you should only have to rely upon the primary “live mix” which is a monaural track, and represents the Production Mixer’s best blend of the set mics. Keep the “attenuated live mix” and the ISO’s muted at all times, except when you need to temporarily cut to the attenuated mix in lieu of the primary mix. When you do need to cut to the attenuated version, mute the primary track during that cut. Do NOT play more than one of the “live mix” tracks at a time, nor play the ISO’s over the “live mix”. To do so would result in the same actor being played off of multiple tracks at the same time, and would sound really bad.
Editing Instructor: Reading through your Addendum I see that you advise 24fps timecode for projects that shoot on "sprocketed" film.
However, even when they shoot on sprocketed film at 24fps we tell the Picture Editors to create projects that are 23.976fps, NOT 24fps. We do this because often they do reshoots with digital cinema cameras like the Red.
Would this affect your advice on recording at true 24fps for sprocketed film shoots?
Fred: As of not too long ago, it was industry practice to match the actual (on location) camera rate, since that determined the real time speed of the image. Running sound at 23.97 if camera ran on the set at 24.00 used to create minor sync problems, since the actual camera speed gets reduced in post by 0.1% to achieve 23.97 In effect, a dialog scene that took the actors 24 seconds to speak, now would only have a picture screen time of 23-plus seconds, while the recorded audio runs 24 seconds (unless it is also reduced in post). But if the audio were recorded live at 23.97 while the camera ran at 24.00 -- then an event that lasted 24 seconds would still contain a full 24 seconds of audio, if projected at 24fps. When you change camera speed in post to only 23.97, your audio needs to be shrunk by the same margin -- but if it had originally been recorded at 23.97 -- then it is NOT being shrunk during post and will be out of sync when the picture
footage is altered. That is how I understood it all to work.
Things may have changed with the latest edition of Avid.... so perhaps this issue needs to be raised with FotoKem or someone. Now, if pickup footage is done later at 23.97 and then added to the timeline, the audio for the pickup footage would certainly use the same timecode as the camera (23.97) so there is no concern about sync.
But I was always under the impression that film shot at 24fps should have audio with 24.00 fps timecode -- and then Avid could adjust both the picture & audio down to 23.97 equally.
Editing Instructor: I'm glad we're having this discussion.
I understand and agree with everything you said - BUT ONLY for audio that goes through the telecine process and is sync'd in telecine and then digitized into the Avid. I don't believe the frame rate needs to be a true 24fps if sound files are going to be imported, separately from picture, into a 23.976 project.
None of our Senior (or 355) projects have the sound sync'd to picture during telecine.
If 24fps picture is transferred in telecine at a 23.976 fps rate WITHOUT sound, then shouldn't the sound files, which are imported separately into the MC HD project, be recorded at 23.976? Regardless of what frame rate the sound files are recorded at, as soon as they are imported into a 1080p/23.976 project, they come become 23.976 fps clips.
Regarding the old days, whenever we were shooting sproketed film we always created 24p projects - SD or HD 24fps. But some years ago, FotoKem told us they prefer the 23.976fps projects rather than 24fps. That still makes no sense to me because, I believe (correct me if I'm wrong anybody) the DCP FotoKem eventually produces for the Showcase is a true 24fps. ????
Fred: It does not matter if the audio is sync'd before telecine or back in the edit bay. The issue is that when the film was shot it was running at 24, then it gets converted at some stage to 23.97 -- which meant it is now running at a slightly different speed than when it was shot. Therefore, the sound cannot remain at the same speed it was on the set.... it also needs to be converted to match the new length (aka speed) of the picture. I think that this can be simply done when the audio is imported into Avid (by checking a box or something). But if the audio does not get converted, then it would be out of sync by 0.1%.
At least that is how I understand it.
On short takes, it would not be apparent. But on longer takes, the sync will slip.
Unless Avid has a way of correcting for this, these days???
Avid tech: By default, Media Composer automatically converts the sample rate to match that of the project. This behavior is controlled by two checkboxes in the Import settings, under the Audio tab:
Convert source sample rate to project sample rate is checked by default. This is what tells Media Composer to SRC the imported audio, as noted above.
Do not convert sources with pullup or pulldown rates is also checked by default. This tells Media Composer to not to SRC audio stamped with pullup or pulldown sample rates, e.g. 47952 or 48048 Hz. Media Composer stamps the imported files with non-pullup/non-pulldown sample rates, and plays them back 0.1% slower/faster than if they had been converted. Remember, this only applies to audio originally stamped with pullup or pulldown sample rates, e.g. 47952 or 48048 Hz.
Editing instructor: I concur with Joe on that. One of the many things that confuses me about sound is discussing sample rate AND timecode fps. Am I correct in believing that SAMPLE RATE is the key element (I don't know that "element" is the correct term here) in sound? Regardless of the timecode frame rate (23.98, 24, 25, 29.976 DF, 29.976 NDF, 30 DF, 30 NDF), isn't the sample rate the key point?
All I know for sure is that, whatever the original timecode rate is for a BWF file, when it get's imported into the Avid, it plays at the timecode rate established for that project. And, as Joe points out, the Avid editor can choose either to convert the SAMPLE rate or not - the default being convert which is what we do.
HERE'S WHAT I REALLY KNOW. This discussion has brought back terrible memories of being in Algerbra I and II classes in high school. I NEVER understood what the hell anything meant, but I made A's by memorizing formulas. Then there was Physics class.... too painful to even discuss.
NOW - real world issue. Prof. Thomas has told the crew of "Charles and Claire" they must do their reshoots using a Red Camera. They originally shot 35mm film. Film was telecined MOS to HDCam SR tape and digitized to an Avid HD project - 1080p/23.976, full raster, etc. Sound Sample rate - 48 kHz. Bit depth 24.
Based on what you've said, their sound recordist on set should have recorded TOD timecode running at a true 24fps. For reshoots, when they use the Red Camera which will use timecode of 23.976fps, the sound recordist will now record TOD timecode running at 23.976.
In the Avid, the student editor will do the usual - import the new BWF files, converting their sample rate to the project's sample rate which is 48 kHz. The imported sound clips will run at the frame rate of the project which is 23.976.
Fred: Yes, it actually is all about the sampling rate. 48k is the norm, and plays back in real time. No speed conversion. To convert from 24.00 to 23.97, the Avid actually changes the playback sampling rate from 48.00 down to 47.9. Sometimes in the field, we (used to) record at a faster rate of 48.048, but faux stamp the metadata as 48.00. That way, if an edit system played our files back at 48.00 -- in essence the system was converting the sampling rate and staying in sync with 24fps picture that had been converted (slowed down) to 23.97. In those instances, it is important to tell Avid NOT to convert the source sampling rates! (As per Joe's explanation.)
But if we did not force the speed conversion by recording at 48.048 and playing back at 48.00 -- then the Avid can do that for us by converting material originally recorded at 48.00 and playing it back internally at 47.9
So bottom line: if camera is at 24fps, then use 24fps timecode @ 48k. If camera is at 23.97, then use 23.97 timecode @ 48k.
For reshoots, they should just use 23.97 for camera and sound -- since the end product will be a DCP with everything @ 23.97 The new footage should just slip right into the timeline. The speed/sampling rate conversions only apply to the clips when they are brought into the project. Everything in the project does not get converted; only those clips that need to be converted in order to match the specs of the project (23.97).
AVID tech: Sample rate conversion preserves the playback speed of the audio by resampling it at the new sample rate. The reduced number of samples compensates for the longer sample period (time interval between samples). Playing back unconverted audio at a different sample rate changes the sample period, but not the original number of samples. This changes the length and frequency of the recorded audio.
Example:
Exactly one minute of a 1000 Hz sine wave is recorded at a sample rate of 48,000 Hz. The resulting file contains 2,880,000 samples (48,000 samples x 60 seconds) spaced 20.833 msec (1/48,000) apart.
Converting the sample rate to 47,952 Hz results in a file one minute long, containing 2,877,120 samples (47,952 samples x 60 seconds) spaced 20.854 msec (1/47,952) apart. The longer sample period compensates for the reduced number of samples.
Playing back the original 48,000 Hz file at 47,952 Hz plays back the original 2,880,000 samples, but the slower sample clock spaces them 20.854 msec apart. As a result, the one-minute file takes 60.06 seconds (2,880,000/47,952) to play back. Because the sine wave takes 0.1% longer to play back, its frequency is reduced to 990 Hz (1000 Hz x 0.99).
In other words, the bottom line on all of this is -- when in the field, the sound mixer should always record at the same timecode setting as the camera: 23.97 if the camera is set to 23.97; or 24.00 if the camera is set to 24 fps. Later on, if the 24 fps camera is brought into the Avid at 23.97 (thus altering the speed of the picture), then the original 24.00 audio is also converted by Avid down to 23.97. So it all remains in sync.
This is correct. This way, the source audio can always sync to the original camera footage, inside or outside of Media Composer. Ideally, the same TOD time code should feed both the camera and the field recorder.
Future material that was shot (video) at 23.97, with audio recorded at 23.97, could be added to the timeline as is -- since nothing needs to be converted by Avid.
This is theoretically true, though there is no harm in leaving the Media Composer sample rate conversion checkboxes on their default settings. Only audio files needing conversion would undergo it.
As I have always said, timecode can get tricky. My advice in the olde dayes, and still my best advice today, is to always check with the Post Production Supervisor as to what settings they want you to use on the set!