Editor's Note: This is a draft of an article that I am working on for a major trade publication (to be announced).
 Here is my take on how to install microphones into your Rycote. I was surprised to discover that there is not much out there in the way of advice or instructions.
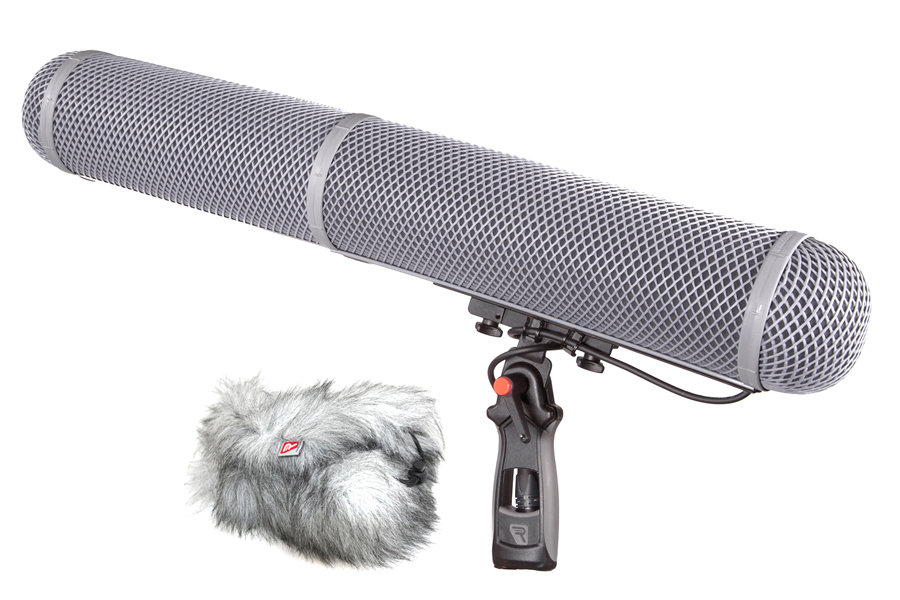
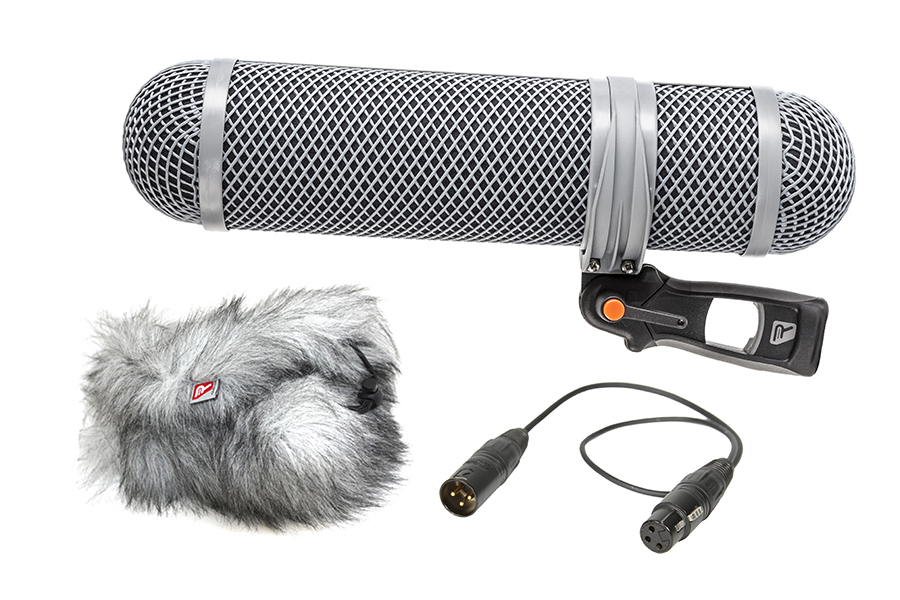
In the world of microphone wind protection, it is accurate to say that Rycote is considered the big daddy and the unofficial standard of the industry. For as long as I can remember — and that goes back more than a few decades — if you needed to use a shotgun microphone outdoors on a windy day, you mounted it in a Rycote (blimp) windscreen.
The use of the Rycote outdoors was so common that many folks never even knew what a shotgun microphone itself looked like! They only recognized the shape of the long, and often fur covered, blimp!
Long before Rycote became popular, there were the original blimps made by a microphone manufacturer for their shotguns. But those early blimps were metal, heavy, and the shockmounts stiff and unwieldy. The industry needed something better designed.
Rycote was formed in 1969 by John Gozzard. He was a sound mixer in the UK, and started the company since the choices were limited, to say the least, at that time. The company has always been based in Stroud, UK - and to this day every Rycote product is designed & made in Stroud.
The term “blimp” was also used by motion picture camera people to refer to soundproof housings that fit over their cameras. “Windscreen” was too broad of a term, and included all shapes and manners of wind protection, including simple foam covers.
Rycote took a British approach and always referred to their product as “windshields”. Hollywood sound people often used the term “zeppelin”, since that is what the windscreens looked like, and an American firm (LightWave) went and claimed the name so that it could only apply to their own, thinner, products. Currently, Zeppelin is a registered trademark of K-Tek, who acquired the rights when it was discovered, after the death of LightWave founder Les Drever, that he had not, in fact, registered the name.
Sennheiser and RODE Microphones use the term blimps to refer to their wind protection products.
These days, most sound people toss around the words blimp and zeppelin without regard for the history or official trademarks. But regardless of who calls it what, the bottom line is that these days the overwhelming majority of soundmixers use Rycotes when they need maximum wind protection for their shotgun mics!
The first step is to remove the rear endcap, by gently twisting counterclockwise. Be careful to grasp the plastic ring, and not the fragile mesh.
Loosen the two locking screws on the underside of the rubber slide at the pistol grip, and slide the shockmount assembly out of the blimp shell.
Adjust the spacing between the microphone suspensions for an appropriate balance for the weight and length of your shotgun. Simply squeeze the side supports and lift out of the holes; or use a small screwdriver to undo the bolts under the supports (depends on your model).
For a long shotgun, such as the Audio Technica BP4071-L (22 inches) — I use the maximum spacing. For shorter and lighter mics, such as the BP4073 (9 inches) — go with closer spacing, so that it does not obscure the sound ports nor interfere with the use of a slide-on foam windscreen.
Aligning the mounting position of your microphone is extremely important. The trick is to avoid having the nose of your mic protrude into the front cone, while keeping the rear of the mic (with mic cable attached) out of the rear cap.
 With short mics, that is pretty simple to do. There is usually a lot more length in the blimp than what you need. But with the longer mics, you need to be precise.
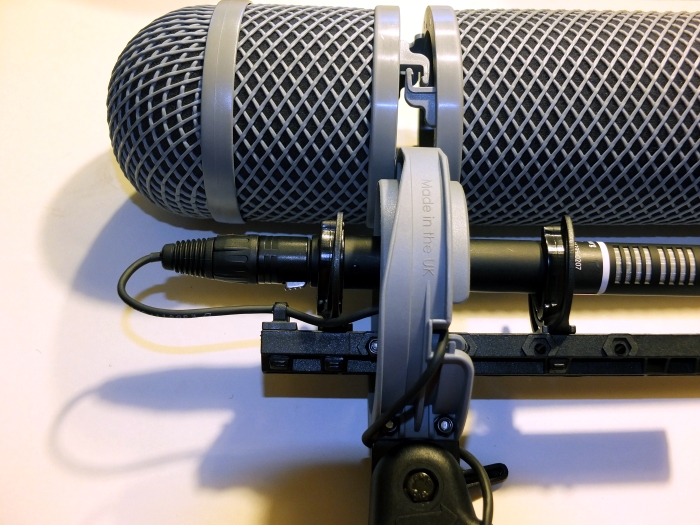
Lay the pistol grip shockmount alongside of the blimp, so that the rubber slide is perfectly aligned with its slot. The end of the slide should line up with the end of the slot at the plastic ring where the end cap would attach.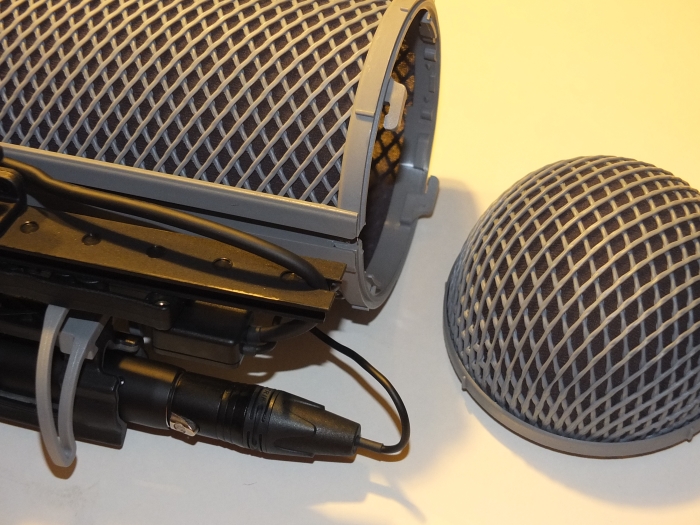
The nose of the microphone should not extend past the plastic ring where the front cap attaches to the blimp. You need at least those couple inches of airspace between the absolute front tip of the blimp and the tip of your mic.
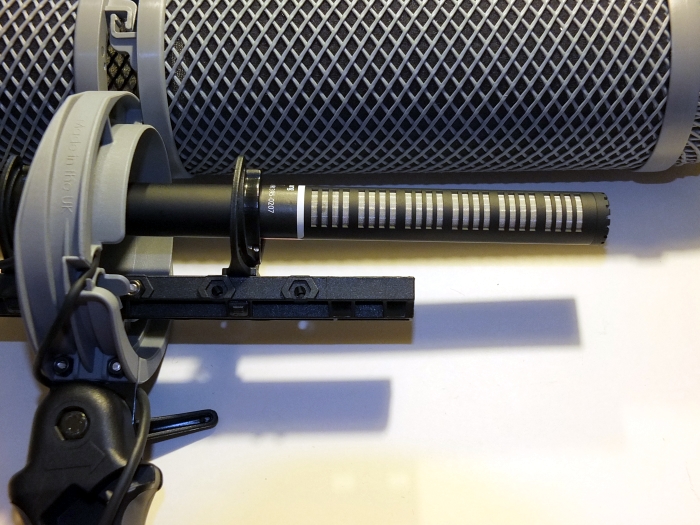 If your mic is shorter than the maximum specs of the blimp, that works out well. The more inches of dead air up front, the better. But do not position the mic any closer to the front than the plastic ring.
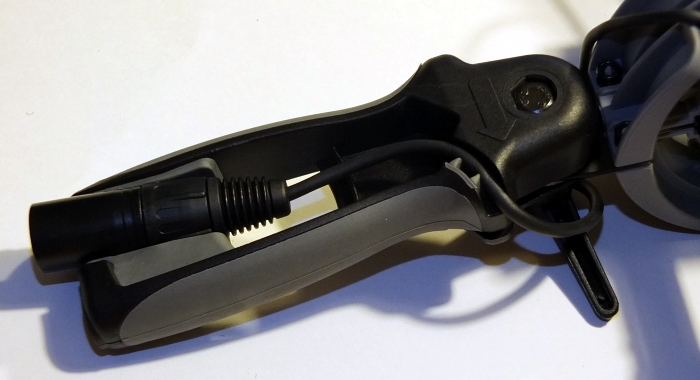
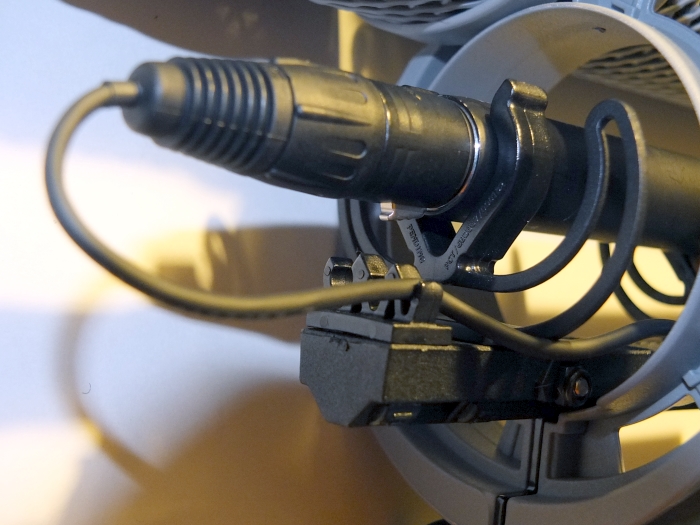
Look at the rear of the mic. Make sure that you have attached the short and thin jumper XLR connector cable that runs between the mic and handle of the grip. Gently bend the excess protruding cable back along the connector so that it does not dangle rearward. Use a small strip of cloth camera/gaffers tape to secure the folded cable to the connector, if necessary. You should also wrap a short strip of tape around where the connector clicks into the mic itself, to prevent any mechanical rattle at the point of connection.
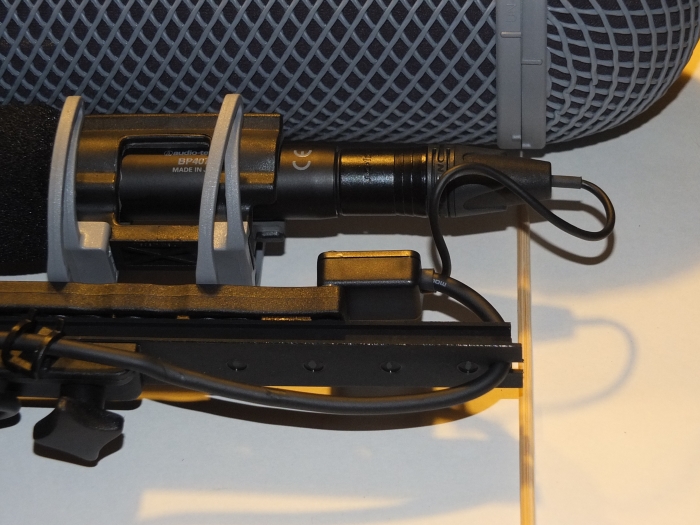 The end of the XLR jumper should, ideally, not extend past the plastic ring. The fold of the cable should also not go past the ring, if possible. For sure, the cable loop should not touch the inside of the rear cap.
If you must choose between having either the front tip of the mic extend into the cap area, or the rear of the XLR connection entering into its cap section — then favor the front position. The airspace at the front of the mic is more crucial. If the cable loop extends too far to the rear, try trimming back the rubber strain relief where the cable exits the XLR connector, or have a technician build you a custom jumper cable. Generally, I have never had any problems with the XLR jumpers that are provided by Rycote.
Once you have determined the placement of the shotgun mic, then go ahead and clamp the mic into the suspension mounts if you have not already done so.
I confess that I break the rules and like to deploy a thin foam windscreen INSIDE of the windshield, even though this practice is not the official way of doing things.
For all but the most extreme wind conditions, the use of the mesh shell and furry Windjammer outer cover should routinely suffice. It is a well-known fact that you should always use as little covering over the mic outdoors as necessary in order to preserve the best audio response. The more layers that you add, the more that some frequencies get affected.
But Murphy always seems to visit my sound crew, and the god of wind follows my boom operator around like a pet dog.
A thin foam sheath inside of the shell provides a lot of extra defense against a strong gust, providing that you maintain ample airspace between the foam around the mic and the inside of the shell. The foam must never get too close to the inner walls, or you negate the effectiveness of the blimp.
On a short shotgun mic, which is wholly suspended near the rear XLR, it is fairly simple process to add a foam windscreen by just sliding it over the front. This really comes in handy when you remove the blimp for interior scenes and only require a basic foam windscreen.
 However, the long shotguns have to be suspended further up their length, along the sound ports. That will require cutting out a wedge of the foam windscreen where the clamps attach to the mic.
So make sure that you have carefully measured the final positioning of the mic to insure that the front tip of the windscreen stays behind the front ring and does not protrude into the airspace of the front cap.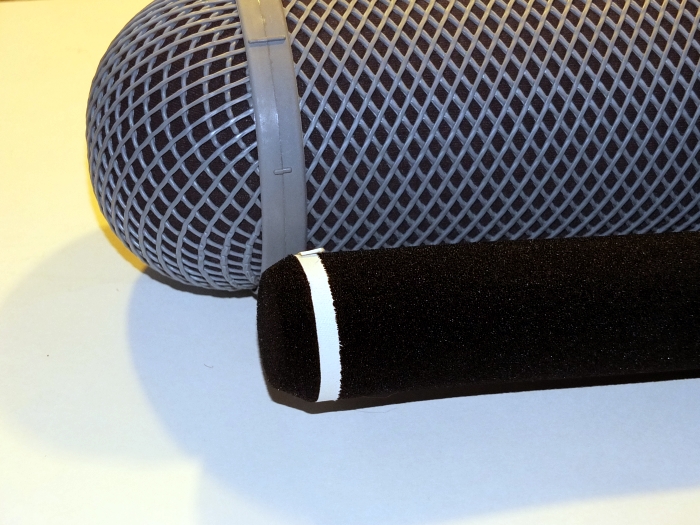
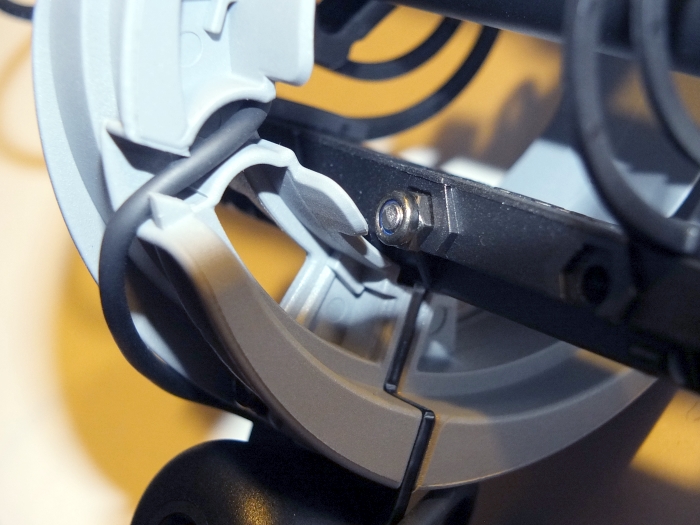
 Before you seal up the blimp windshield, look closely to figure out the best way to thread the jumper cable from the mic down to the pistol grip.
On their longer windshields, Rycote provides an attached cable so that is a non-issue. Just pay attention that you do not end up with excess slack that could strike the inside of the rear cap.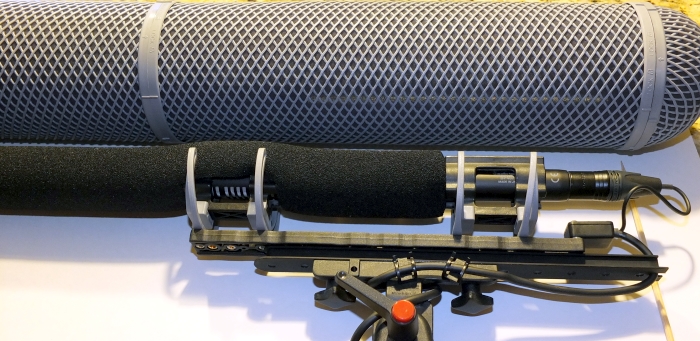
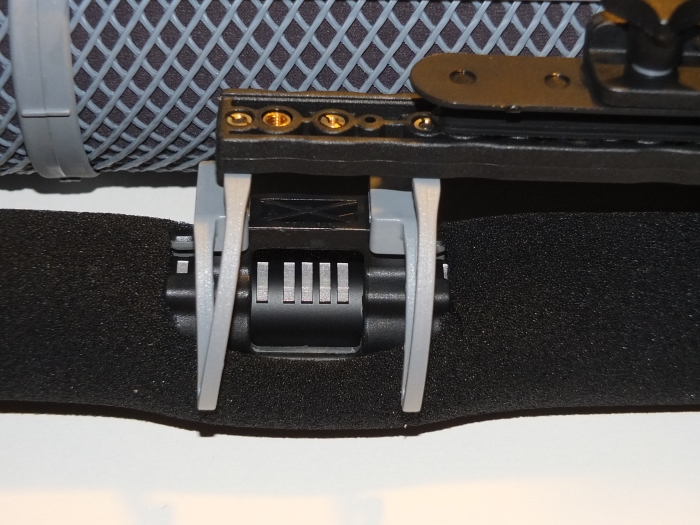
 On my shorter (Super-Shield Kit) windshield, there are clamps just underneath the microphone to secure the jumper cable.
The cable is then fished underneath the mic so that it can exit via a cable channel built into the center support ring.
On other model blimps, there should be special slots or cable pathways along the underside of the rubber slide or near the rear cap.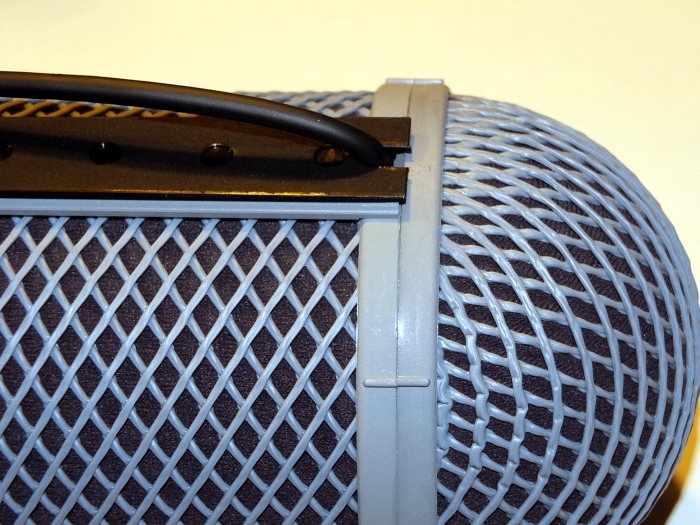
Wrap excess cable around the pistol grip so that it cannot add to handling noise.